|
So far Game Art and Design (GAD) has been such a great pathway. As someone who is very interested in art as well as technology, this class has been the perfect match for me and has helped me find my passion. Looking back on this year, I am proud of my progress as both a 2D and 3D artist. I feel pretty comfortable with both Blender and 3ds Max and I have learned a lot about drawing digitally and getting a good grasp of concepts such as anatomy and shading. Going into my Junior year I am excited to get into more elements of game design, such as learning basic programming in C# and more about the game-making process. My parents are both in careers around programming and I am very interested to give it a try to see where I stand. One of my greatest aspirations that has grown through this course has been creating a game, and the idea of being able to bring a concept to life sounds amazing. I don't know to what extent this class will change due to it being online, but since it is mostly independent and online, I don't think it will be majorly affected. Sadly of all years, Junior year was supposed to be the most group-based and hands on, which I'm disappointed to miss out on. Overall I am excited to be able to put our developed skills to use in the game making process this next year and am looking forward to it! Summary:
0 Comments
Over this summer I decided to get more into 3D Modeling. Since 3ds Max hasn't been the greatest experience for me, I figured I'd try learning Blender since it is free and looked intriguing. At first glance, the UI was absolutely beautiful. The dark color scheme and gray tones complimented by a poppy orange helped me feel a lot more comfortable and less overwhelmed, unlike 3ds Max which immediately welcomes you with bright whites and turquoise blue. To add on to that, Blender opened within a few seconds, significantly differing from 3ds Max which makes your computer growl and takes several minutes. Overall from first impression, Blender felt a lot smoother and more comforting than 3ds Max. Another great thing about Blender, that comes with it being free, is tons of great tutorials that are easily accessible on YouTube. Blender Guru and CG Fast Track are both extremely detailed and go at great paces. They give a great tour through the program for newbies such as myself, contrasting from my experience with 3ds Max tutorials which felt overwhelming and never properly touched on all the basic functions of the program. Blender Guru has a great personality and is someone I would watch just for entertainment, making 3D Modeling more of a fun activity rather than a task. I began with his Doughnut Tutorial and it touched on all the significant features in Blender, helping me explore my interests and get a hang of all the basics. 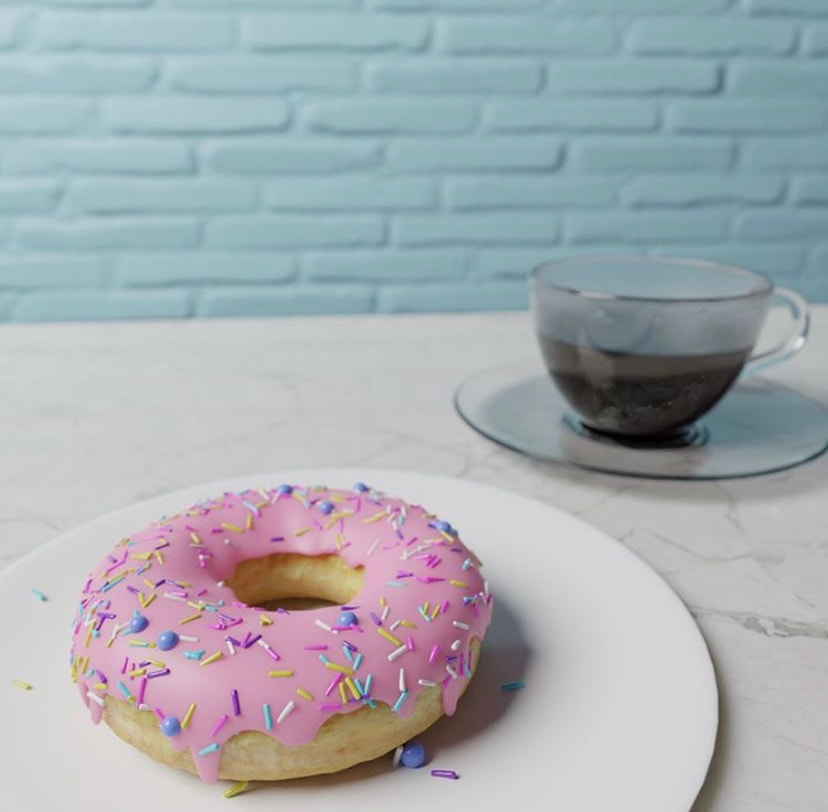 This is the final render from the doughnut scene that the tutorial walked me through. It introduced me to several different modeling techniques and helped give a lot of variation through making both the cup/plates and doughnut. I fell in love with a lot of features on Blender that were new to me, such as sculpting and compositing. Blender also has a completely different workflow from 3ds Max, with features such as Loop Cuts and the Knife Tool which made it much more intuitive. It was really fun to try so many new things such as the particle system, sculpting, hand painting, advanced material compositing, modeling off of reference, adding in custom materials, and much more! After the doughnut tutorial, I moved on to another introductory level tutorial that came from an industry professional and showed some different modeling techniques. 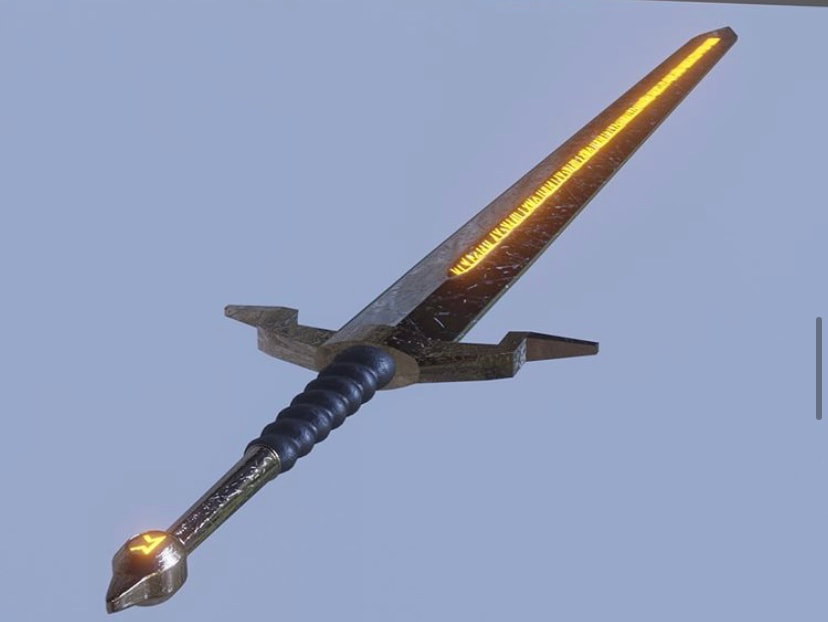 From this tutorial I got more experience with the Eevee Renderer rather than Cycles Renderer and also tried more advanced modeling techniques such as in creating the handle. One of the coolest parts was using the Stamp Tool in order to handpaint the symbols on the sword. I then moved on to the next tutorial in the series which involved composing a scene using the sword I made, which was much more complicated. Through this I got a much stronger grasp on rendering and compositing, as well as using/finding outside resources such as the rocks and character shown. 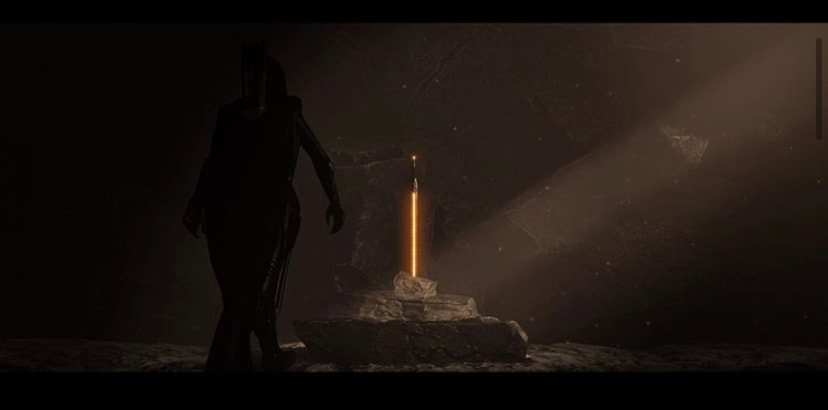 Overall I think Blender is an extremely well optimized program that runs surprisingly smooth despite how many features it has. It was a much greater beginning experience than 3ds Max and I feel like I got a firm grasp of the program through better tutorials and a more navigable UI as well as modeling workflow. However, it was nice to be able to carry over some of my experience from 3ds Max so that it was less overwhelming. I would love to see Blender be more widely taught and integrated into the industry as time goes by, because I think it is a top tier program that made much more sense to me. Summary:
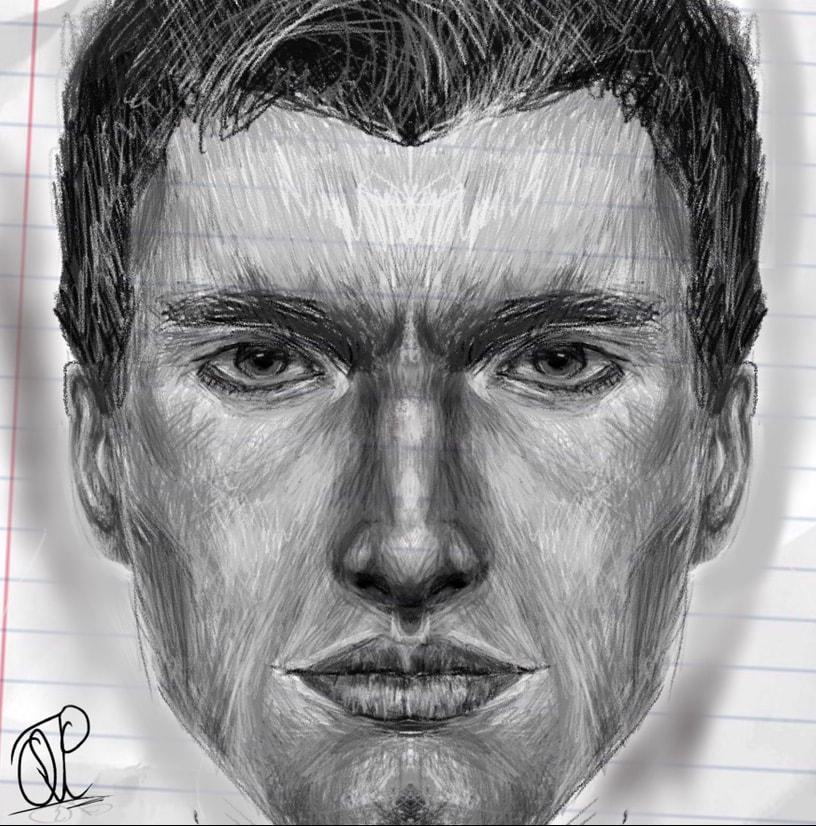
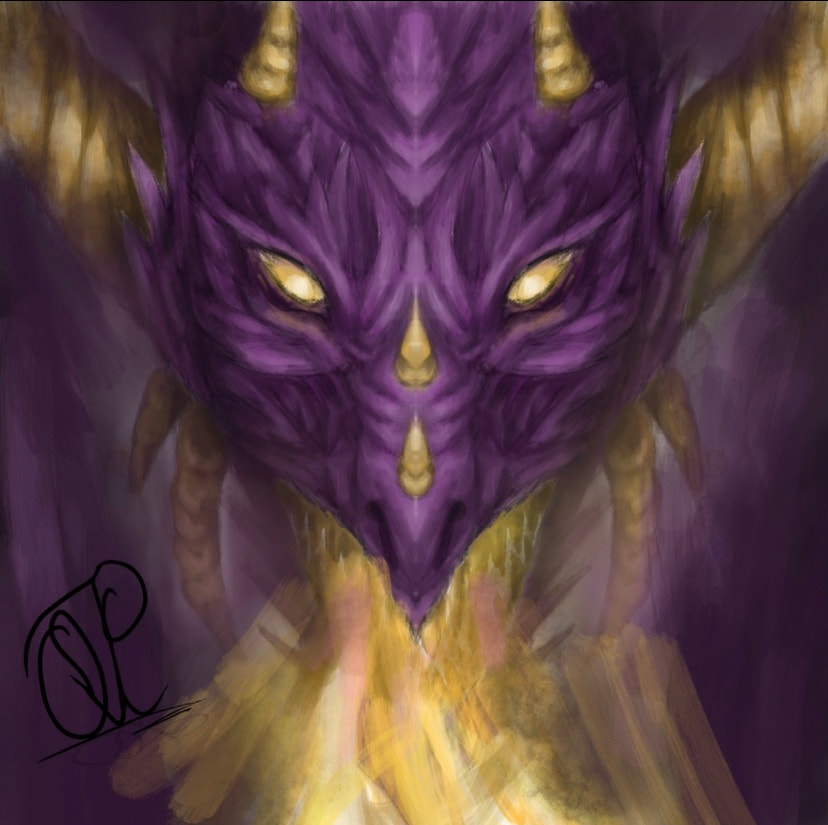
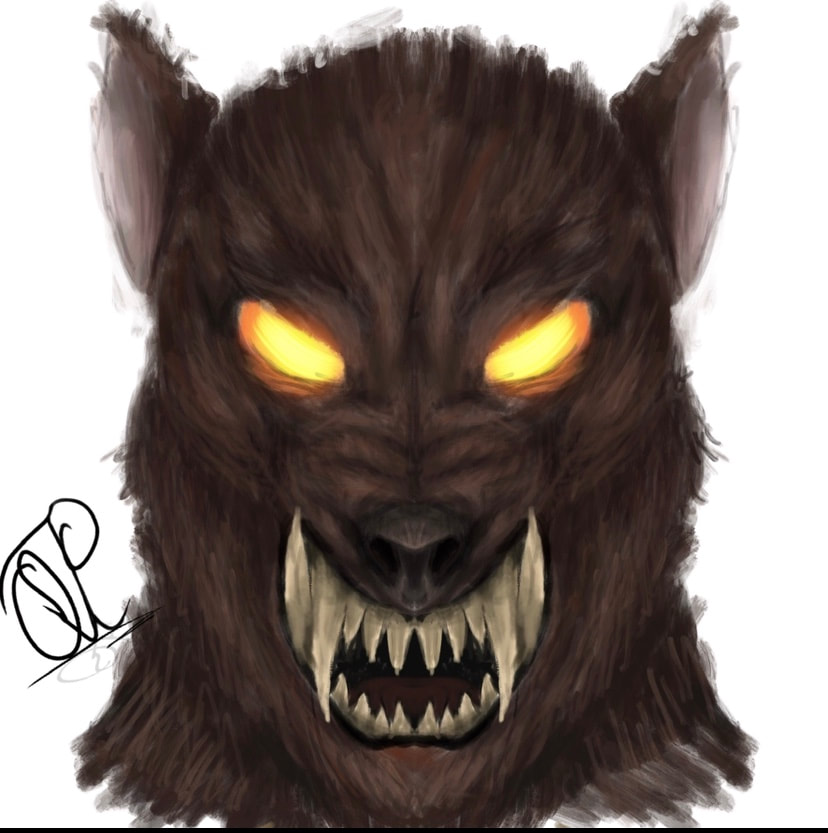
References: Sword Tutorial: https://www.youtube.com/watch?v=zHv4VDoCwYc Doughnut Tutorial: https://www.youtube.com/watch?v=TPrnSACiTJ4 Blender Citation: Community, B. O. (2018). Blender - a 3D modelling and rendering package. Stichting Blender Foundation, Amsterdam. Retrieved from http://www.blender.org Being a new artist is always extremely hard. Whether its being overwhelmed by trying to start with too much, not knowing where to begin, or being demotivated by seeing art way better online, every artist has issues starting out. For me, it was all three of these. I overestimated my abilities and tried starting with too much.  For example this is the first piece I attempted. Although I did use reference, which helped, it looks significantly different from what I was going off of. Even with a reference photo, it is extremely hard to get proportions correct and to get around face anatomy. This piece was way too much too soon, because not only was it a hard angle, but the lighting had dark tones of blue and grey, which is not a good place to start for artists new to shading skin tone, like me. After that I decided to take a step back, and moved on to simpler pieces, all using the symmetry feature, reducing my workload and allowing me to do a simple front view drawing. I also freestyled the design, with a theme in mind which was fantasy creatures. By doing my own design, I had more freedom and it made drawing a more comfortable experience. Overall, for me it was important to start on front view pieces with symmetry and no complicated angles or lighting.
After I felt more comfortable with basic shading techniques and getting around different types of facial anatomy, I thought it was time to try body anatomy and do a slightly unsymmetrical angle (no symmetry on) in order to experiment with different shading as well as lighting. I also added in some of my own stylization with a unique brush I downloaded. I used reference photos which is important because it can take a while to get a good grasp on anatomy due to the substantial amount of details.  Overall I think it is important to pace yourself as an introductory artist, and start with the basics. Throughout this process I feel like I improved significantly just by taking it slow, and am excited to see how I progress in the future. In a nutshell:
Game Design was one of my favorite classes during my freshman year and even got me looking into some new career pathways and options. Going into my second year, I'm excited to once again bond with an amazing class full of friends, as well as get to hone in on some skills we scratched last year. I know we will be working a lot more with 3D modeling, which I struggled with the most, but that's why I'm interested to dig deeper into it! Modeling is by far the most complex form of art I've worked with and there are so many amazing things you can create.  This is a sample of what I created last year. As you can see it is terrible, and that took several days, with help, to complete. Going into next year one of my goals is to not only be much better at creating 3D models but also to put more effort into my work and explore more. By explore I mean I want to be able to figure things out on my own, and I want to mess around with the tools and settings even if it takes a turn for the worst. This way I can get even more accustomed to the programs we use in class and become more independent. Overall I am excited about this upcoming year and am looking forward to improving and seeing where this class takes me! Summary:
References: “Autodesk 3ds Max Reviews: Overview, Pricing and Features.” Financesonline.com, reviews.financesonline.com/p/autodesk-3ds-max/. After revisiting some skills I learned last year in Photoshop in my last blog post, I decided to go more in depth with those skills as well as learn some new ones in the process of designing a character. I did this in the Character Development class at the A.I.M. summer camp in NCCU. Not only did I have a teacher to teach me new techniques and guide me throughout the way, but the camp also supplied everyone with a Wacom Intuos Pro and I got my first experience with using a Wacom tablet and drawing digitally. In this post I'll walk through my process in designing my character, Gabe Petey.  To start, I planned out my characters background and all of his characteristics, creating a mental picture of what I wanted him to look like in my head and on paper. I then began designing, using the symmetry tool to create a line of vertical symmetry through my template so I could begin sketching my character and maintain facial symmetry so my character does not look distorted and looks as realistic as possible. After creating my outline using small strokes, I began to fill my character in with color, using the paintbucket tool, to get the colors I wanted in place. After filling in the color, I decided to begin shading and creating depth. For this I increased my brush's diameter and created a shortcut for the blend/eyedropper tool. I then added in simple strokes and blended them in consecutively until the shading looked smooth and neat. After shading my character in, I added in a background using the same brush settings to easily create clouds and the sun. Eventually I began adding more details into my character, such as drawing in more discrete facial hairs and freckles to add more realism to my character. 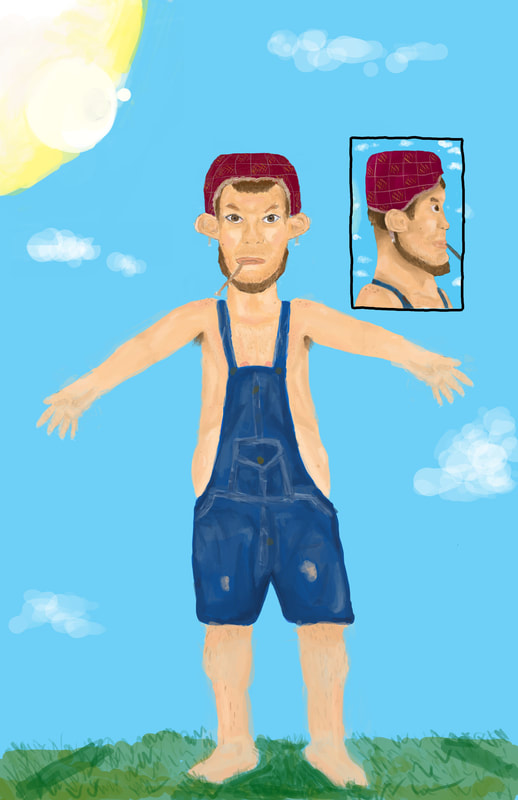 As seen in the image above I then worked on creating a full body and a preview for a side view. To create the side view I implemented the ruler tool on to my original front view and used the lines it created in a new layer to figure out the positions of all the facial features for my side-view. From there I used the same process as I did to create the front view. Finally, I began working on the body in the form of an A-Pose. I again used the same process for the skin tone, but the denim was tricky. First I used 'Place Embedded" to add in an image of denim. I then used the eyedropper tool to sample colors and the shading from that image and implemented it into my own, using that to create seams and folds in the jacket to create the texture. From there I was done and began touching up minor details. Overall I got some experience with the Wacom tablet, as well as learned some new tools and methods to help with shading and creating different views/angles of a person, as well as got to work with the process of character development and design. In a nutshell:
References: “Women Clothing Blue Jeans Denim Overalls.” Amazon, Amazon, www.amazon.com/Women-Clothing-Jeans-Denim-Overalls/dp/B071HVYCX9. “Wacom Intuos Pro: Creative Pen Tablet.” Wacom, www.wacom.com/en-gb/products/pen-tablets/wacom-intuos-pro. 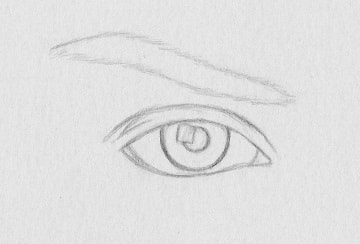 For this assignment I chose to revisit Adobe Photoshop and look more into the process of creating an image from scratch by colorizing, shading, and working with layer styles. I started by drawing a simple eye outline and photocopying it. This would be my template. I then used the brush and paint bucket tools to fill in basic areas and outline my pencil strokes. I then worked with detail in the iris by adding a bunch of fine strokes and then used the paint bucket around it to create a nice texture and color for the eye. I then drew veins in the eye and tried to make it look as realistic as possible. Next I added hairs into the eyebrow to give it texture and then to add to the background I drew in a nose and more skin textures/outlines. I then used the burn and dodge tools to help give the eye more dimension and shade in certain parts of the drawing to create realism. Finally, since it seemed a bit plain and lacking texture, I chose a layer style called Craquelure. Overall I am very pleased with my final product, though it did take a lot of time, patience, and detail! 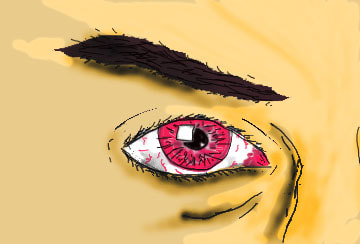 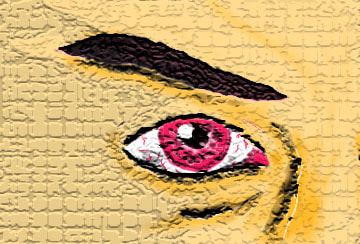 Final product! Summary:
References:
|
AuthorMy name is Quinn Peterson! I will be reflecting about my art work in this blog! Archives
May 2022
Categories
All
|
 RSS Feed
