|
After revisiting some skills I learned last year in Photoshop in my last blog post, I decided to go more in depth with those skills as well as learn some new ones in the process of designing a character. I did this in the Character Development class at the A.I.M. summer camp in NCCU. Not only did I have a teacher to teach me new techniques and guide me throughout the way, but the camp also supplied everyone with a Wacom Intuos Pro and I got my first experience with using a Wacom tablet and drawing digitally. In this post I'll walk through my process in designing my character, Gabe Petey.  To start, I planned out my characters background and all of his characteristics, creating a mental picture of what I wanted him to look like in my head and on paper. I then began designing, using the symmetry tool to create a line of vertical symmetry through my template so I could begin sketching my character and maintain facial symmetry so my character does not look distorted and looks as realistic as possible. After creating my outline using small strokes, I began to fill my character in with color, using the paintbucket tool, to get the colors I wanted in place. After filling in the color, I decided to begin shading and creating depth. For this I increased my brush's diameter and created a shortcut for the blend/eyedropper tool. I then added in simple strokes and blended them in consecutively until the shading looked smooth and neat. After shading my character in, I added in a background using the same brush settings to easily create clouds and the sun. Eventually I began adding more details into my character, such as drawing in more discrete facial hairs and freckles to add more realism to my character. 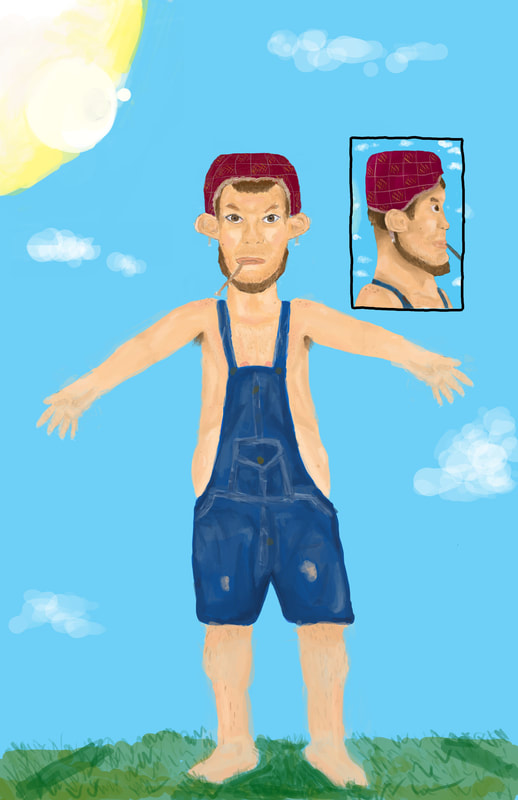 As seen in the image above I then worked on creating a full body and a preview for a side view. To create the side view I implemented the ruler tool on to my original front view and used the lines it created in a new layer to figure out the positions of all the facial features for my side-view. From there I used the same process as I did to create the front view. Finally, I began working on the body in the form of an A-Pose. I again used the same process for the skin tone, but the denim was tricky. First I used 'Place Embedded" to add in an image of denim. I then used the eyedropper tool to sample colors and the shading from that image and implemented it into my own, using that to create seams and folds in the jacket to create the texture. From there I was done and began touching up minor details. Overall I got some experience with the Wacom tablet, as well as learned some new tools and methods to help with shading and creating different views/angles of a person, as well as got to work with the process of character development and design. In a nutshell:
References: “Women Clothing Blue Jeans Denim Overalls.” Amazon, Amazon, www.amazon.com/Women-Clothing-Jeans-Denim-Overalls/dp/B071HVYCX9. “Wacom Intuos Pro: Creative Pen Tablet.” Wacom, www.wacom.com/en-gb/products/pen-tablets/wacom-intuos-pro.
0 Comments
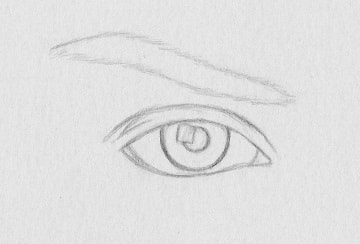 For this assignment I chose to revisit Adobe Photoshop and look more into the process of creating an image from scratch by colorizing, shading, and working with layer styles. I started by drawing a simple eye outline and photocopying it. This would be my template. I then used the brush and paint bucket tools to fill in basic areas and outline my pencil strokes. I then worked with detail in the iris by adding a bunch of fine strokes and then used the paint bucket around it to create a nice texture and color for the eye. I then drew veins in the eye and tried to make it look as realistic as possible. Next I added hairs into the eyebrow to give it texture and then to add to the background I drew in a nose and more skin textures/outlines. I then used the burn and dodge tools to help give the eye more dimension and shade in certain parts of the drawing to create realism. Finally, since it seemed a bit plain and lacking texture, I chose a layer style called Craquelure. Overall I am very pleased with my final product, though it did take a lot of time, patience, and detail! 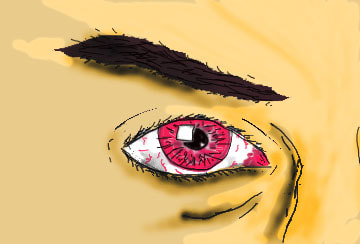 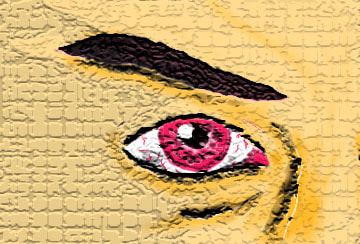 Final product! Summary:
References:
It looks like this will be my final blog post of this year. This year I have struggled and had to experiment a lot to get my way through, but I have learned a lot and my skill set has greatly improved. This class has been a challenge and I have had to figure out a lot of things on my own by experimenting and trying things out. Sometimes I find really unique and awesome things, other times I have to restart. This has taught me to be more independent and I have learned even things my teacher didn't know how to do. My skill set has improved as well. Not only am I well-versed in tons of vocabulary and on a bunch of game design history, but I can make really complex 2D graphics, 3D models, animations using both, and I can even take good photos and create great compositions. I have learned so many things I had no prior experience with, in this class and am well acquainted with tons of different programs, including a good portion of the Adobe programs. Besides for the tremendous amount I have learned, this is a class I can look forward to every day, with great students/peers who I have become friends with and an amazing teacher. It is a very open and collaborative classroom, but also well disciplined (most of the time). Everyone is friendly and you will find yourself as part of a great community of people in this class. Overall I have really enjoyed this year and look forward to sticking with this class through the rest of high school. I have even looked into career paths with game design. Summary:
Throughout this year we have worked with animation, but never before in 3ds Max. I am experienced with animating 2D graphics in the Adobe programs, and I expected it to be harder to animate 3D models since there is an extra dimension to consider. However, 3ds Max makes it incredibly easy. All you have to do it set up your scene, select all, select a new keyframe, then reconfigure your scene, and so on. The program fills in the interpolations smoothly and rigging the animation is extremely easy. All you have to do is move a few things around and change up your objects however you want and that's basically all there is to it.
On the other hand, in the Adobe programs, there was a lot more to it. You had to insert clips, work with all these layer effects, and there were a lot more properties to consider if you wanted to give your animation cool effects. However, 3ds Max is a good 3D modeling program and has animation built into it; Adobe divided their apps into ones that work with creating the graphics and others used to animate. Since 3ds Max has all of it built it, the changes and effects are a lot easier to apply and you don't have to really import a bunch of stuff or do so much work with a timeline. It is very simple and is basically just reconfiguring your scene a couple of times to create your keyframes.
This is a scene I quickly animated.
Conclusion:
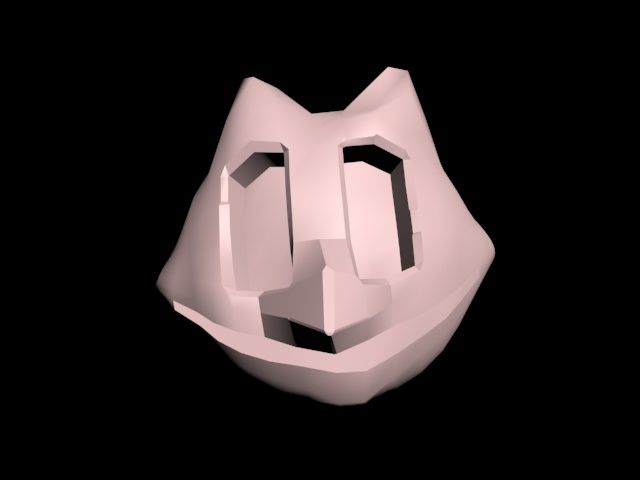
In class, we have been modeling in 3ds Max, and I have become way more accustomed to it. Although I've barely gotten through any assignments since my last post, since I'm horrendously bad at 3D modeling, I have gotten a lot more used to the controls. I can now navigate much easier, using the cube at the top right, and am better at using different viewports based on what angle I want to see my object from. I've also moved on from using just primitives and simple shapes, and have started working with subobjects and modifiers. Instead of using transformation tools on basic shapes and primitives, I've started modeling with subobjects and modifiers. Some tools I've used are extrude, inset, and bevel which allow you to pull out parts of your model and layer it, making it more complex. I've also got to work with the Edit Poly modifier which allows me to adjust and touch up my model and add more detail. The line tool, which is very similar to the pen tool in the Adobe programs, can be used to draw out a shape. You can then use the Lathe modifier to give it dimension. This can be very hard to use and the shape doesn't always turn out how you expect after you apply the Lathe to it. Although if you use it right, it gives you a lot of capability. Overall I have gotten a lot more familiar with 3ds Max. I am able to navigate through it much better. I have used a lot of new tools, such as subobjects and modifiers, which allow me to add more detail to my models. Although I still find 3D modeling very difficult and I have struggled with it, I have also improved.
Summary:
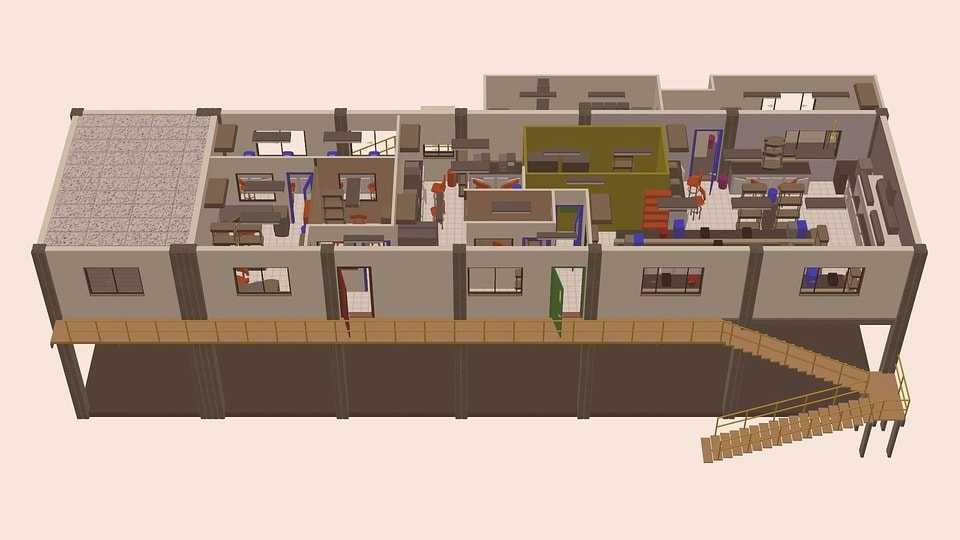
You could probably think of over 100 different examples of where you have seen 2D imagery or 2D design implemented, off the top of your head. However, where have you seen 3D modeling? Some business fields that utilize 3D modeling are engineering, architecture, entertainment, film, special effects, game development, and commercial advertising. It is applicable in many different professions, often replacing 2D imagery, and is becoming even more popular and common to see as our technology becomes better. For starters, engineers and architects use 3D modeling to plan and design their work. They can't base their entire idea based off of a 2D blueprint. They have to be able to see what the structure will look like in the real world and if it will really hold up. It is crucial to be able to bring your design to life and see how it will look from all perspectives and as a whole, instead of as a bunch of 2D diagrams that don't show how the structure will come together or look as a whole. Animators and game designers rely on 3D modeling to bring their ideas to life as well. However, in this case, the 3D model is often used as the final product and is what you see in the game, to bring it dimension and realism so that the game carries the most realistic experience possible. Unless, of course, you live in a 2D world and retro games are the most realistic to you. It is also very common to see 3D modeling applied to the filming industry, like in commercial advertising and movies, especially sci-fi ones with settings that you can't film in real life or on a set. For example in Avatar, which is famous for its amazing graphics and special effects, most of the setting in the movie's home planet, Pandora, was created through 3D modeling. Almost every Hollywood blockbuster uses 3D modeling for special effects, to cut costs, and to speed up production. Another application for 3D modeling is for 3D printing. Modeling is most of the process, except you print what you create. This is more important than creating figurines or objects for your desk. You can see 3D printing being applied to medicine and creating certain bone structures, for example.
Summary:
References: “What Is 3D Modeling & What's It Used For?” Concept Art Empire, 4 Jan. 2019, conceptartempire.com/what-is-3d-modeling/. Slick, Justin. “3D Modeling Process Defined.” Lifewire, Lifewire, 24 Aug. 2018, www.lifewire.com/what-is-3d-modeling-2164. “Free Image on Pixabay - Architecture, Design, Render, 3D.” Architecture Design Render - Free Image on Pixabay, pixabay.com/illustrations/architecture-design-render-3d-2783789/. The long-awaited Borderlands 3 was recently announced to release 13 September 2019, getting the massive Borderlands fan base and community riled up. It is only natural to need to discuss its predecessor, Borderlands Pre-Sequel, which had high expectations considering the amazing reputation Borderlands 2 built for Gearbox, however, ultimately ended up being a let down, according to reviews. Although it got criticism from most people, I actually found its gameplay to be more satisfying than Borderlands 2's and although the story was short and wasn't nearly at the caliber of the story behind Borderlands 2, it tied together a lot of missing information between the first two games and was still very fun. It was really interesting to find out the background behind a lot of what you see in Borderlands 2, almost as if the game was a massive trivia. It also had some clips from after Borderlands 2 and set up for the next game. It does not provide any pivotal points or extremely necessary background information for Borderlands 2, but does show you how things came to be. For example, it shows you how Handsome Jack rose to power and got his mask. It also provides information about the Vaults and why Pandora becomes the setting for Borderlands 2. Besides for those more major points, it has a bunch of minor little things, that are very appealing to extremely Borderlands 2 geeks, such as myself. For example how Claptrap became to be the last of his kind, or how the Hyperion robots drop from the sky. However, the biggest game changer is the gameplay. They added a new element, cryo, which freezes enemies; you can melee frozen enemies and sometimes they break, adding a whole new strategy to killing. There is also a new class of weapons, laser weapons, which are also very fun to use and provide a different style of shooting. Another cool, but controversial, aspect is the anti-gravity environment. In this game there is the concern of oxygen tanks, as well as a different movement style because there is no gravity, allowing you to be a lot more mobile. Lastly is that the gameplay is a lot more realistic and fair. In Borderlands 2 you often find yourself having to rely on glitches/exploitations, or certain combos, especially in the later levels in Borderlands 2, such as the "OP" levels, which are completely unbalanced and almost unrealistic, making it impossible for even the best guns to kill a basic enemy. This was not implemented into Borderlands Pre-Sequel and so it is a lot more playable and less based on comboing gear and exploiting. 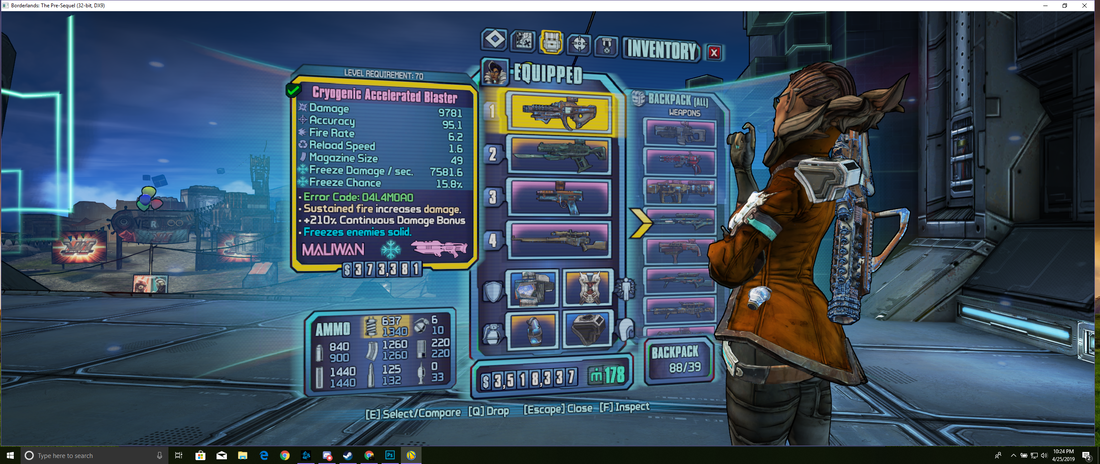 This image shows the new type of gear, a laser gun. It also shows the new element which is cryo. Also, indicated by the light pink rarity of the gun, there is a new classification/class of weapons, which are know as glitch weapons. Conclusion:
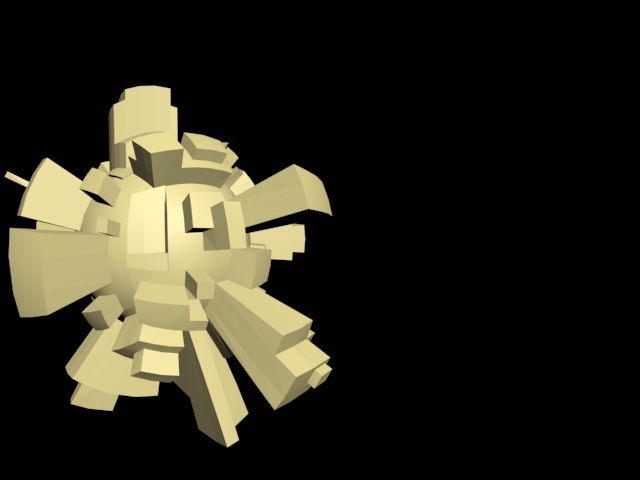
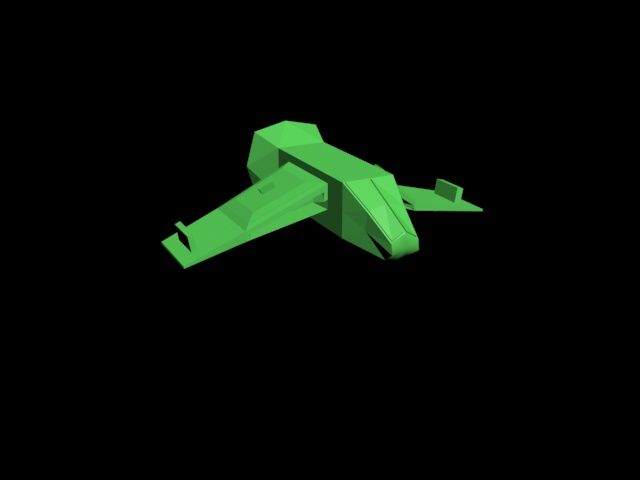
References: “Spoilers - the Ending Borderlands: The Pre-Sequel.” GameFAQs, gamefaqs.gamespot.com/boards/783735-borderlands-the-pre-sequel/70727735. “Borderlands 3 Super Deluxe Edition | PC - Steam | Game Keys.” Green Man Gaming, www.greenmangaming.com/games/borderlands-3-super-deluxe-edition-pc/US?_$ja=cid:1784002518|agid:74892333571|tid:pla-694125170861|crid:343785295437|nw:g|rnd:217161387894376064|dvc:c|adp:1o1|mt:|loc:9009752&gclid=CjwKCAjwtYXmBRAOEiwAYsyl3HRWMTHwgLNgo7encCyZdGq5myrUyIgJ3qVwavB4F6Sst0AW6qWyEhoC_EIQAvD_BwE. After working with creating 2D images and animation, my class has started our unit on 3D modeling, which is a big step from working with 2D objects. I feel like I have gotten the hang of it pretty quickly and am really proud of the work I have created so far. My class has started working in a new program, Autodesk 3ds Max, which is the first program we have used that isn't Adobe. All of the Adobe programs had some of the same tools and a similar format. However, this program is a lot different and we have had to learn how to navigate through it. It is a lot harder to line things up since there is a whole new dimension, the z-axis, which represents depth. Instead of just using the move tool, you have to plug in coordinates, as well as look at the model from the side to make sure everything lines up correctly. Another difficulty with 3D modeling is that you have to know what your object looks like from all perspectives and you have to be able to create your model from scratch, starting with basic shapes. However, besides for the struggles, 3ds Max is convenient in many ways. I really like the ability 3ds Max gives you to split the screen into four different points of view so you can see your model from all perspectives. Also, the finished product of 3D modeling looks a lot better and more realistic than a 2D image. I am really looking forward to working more with 3D modeling and think it is pretty similar to creating 2D images, except there is an extra dimension to consider. That is a small price to pay for such a great finished product.
These are some of the models I have created using only primitives. 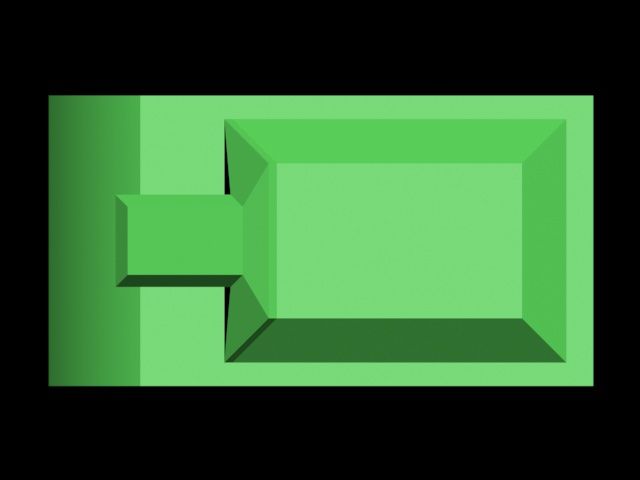 I created this tank from modeling with subobjects. Summary:
References: iMeshup. “3ds Max: Pros, Cons, Quirks, and Links.” Medium, IMeshup, 13 Sept. 2018, medium.com/imeshup/3ds-max-pros-cons-quirks-and-links-a2a48832dbbe. “Autodesk 3ds Max.” Wikipedia, Wikimedia Foundation, 11 Apr. 2019, en.wikipedia.org/wiki/Autodesk_3ds_Max. Now that my class is done using Adobe Programs, I can officially say that Adobe Animate is my favorite. I also really liked Adobe Illustrator, but Adobe Animate allows you to create a character and then bring it to life by giving it motion. I didn't like Adobe Animate at first because of how difficult the program is to get used to, but creating an original motion graphic is hard work and so you can only expect you would need a complex program to do it in. Personally, I like creating my own original characters/2D graphics and I like the finished product when I animate them. By giving it motion, you're really bringing your character to life and giving it a personality. I also have liked Adobe Photoshop and Adobe Illustrator. I didn't like Adobe Premiere that much because the final products were relatively simple and didn't feel as original. I would rather create my own graphics than to edit videos. Adobe After Effects also had a relatively simple product in the end and just seems to be a simplified version of Adobe Animate. I liked Adobe Photoshop because it allows you to do so much with photo editing and you can still create your own graphics. This is an original graphic I created in Adobe Photoshop. Adobe Illustrator is even better when it comes to creating an original graphic. In Photoshop you can use images from online and add effects to them or put them together with other photos. In my example above, I took an image of smoke and put an image of the "No" sign over it. I then recolored the background, added text, and even used the paintbrush tool to have blood dripping from the "No" sign. However, Illustrator allows you to draw/create your own images and is less so working with photos. The mesh tool and pen tool were two of my personal favorites for this task. 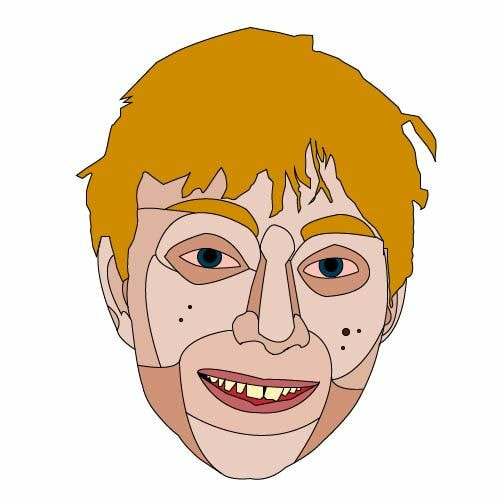 This is an example of an image I created from scratch with the pen tool in Adobe Illustrator. Overall I have really enjoyed this class so far and I have liked working with all of these different Adobe products. They all have different properties and potentials, and can be used for different tasks. It is all a matter of preference. In conclusion:
The Video Editing Project was really fun to film and work on with my group-mates, Zach and Max. We chose vaping as our topic because it is a growing issue and it is a big problem at DSA (Durham School of the Arts). Also many people are being fooled into thinking vaping is better than smoking and that it is healthy, when that is not true. Starting off with pre-production, I was in charge of graphics, so I drew 5 hand-drawn sketches of relevant graphic ideas for our final video, 2 of which were logos, and 3 of which were to be put into the final video.
These are my hand-drawn sketches I created for the pre-production stage. For the production stage I was in charge of creating the team logo, the title screen, the credits, and I also made four other graphics that were incorporated into the video that held the information and facts about vaping. I also helped edit and create the script with Zach, and played the role of Scott, who is the main character in the film. He was peer pressured into vaping by his friend, Travis, after ditching class because he was too nervous about a test he didn't study for.
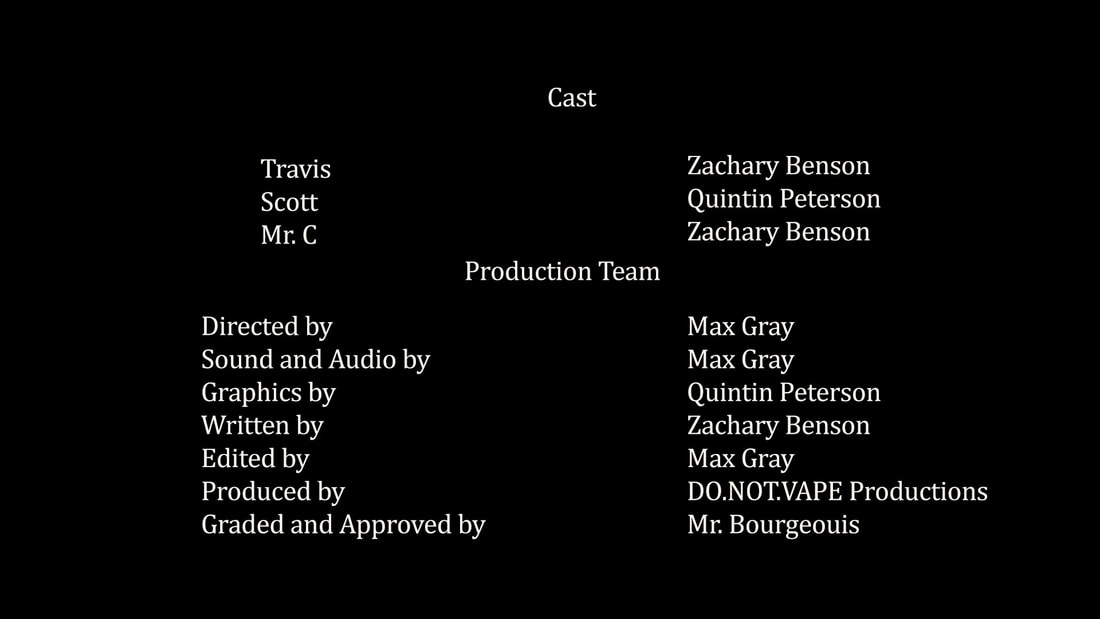 These are the graphics I created for the production stage of the project. Overall I really enjoyed this assignment and think each of us (my group-mates and me) contributed a lot to the final project. I worked hard on the graphics and chose my colors and composition in order to get across a dark tone and convey that vaping is damaging to your health and is not something to play around with. I tried to have my graphics match what was going on in the video and being talked about. Conclusion
Citations for our research: “Vaping: What You Need to Know (for Teens).” Edited by Hillary B. Gordon, KidsHealth, The Nemours Foundation, Feb. 2019, kidshealth.org/en/teens/e-cigarettes.html. Posted byJeffrey BuckleyI was a smoker for over 25 years. In this time I also earned my medical degree with a specialization in addiction treatment and counseling. That period has led me to vaping. “Side Effects of Vaping: New Studies and Researches Explained.” Vaping Daily, vapingdaily.com/what-is-vaping/vaping-side-effects/. Wootton-Greener, Julie. “Teenage Vaping: E-Cigarettes Are No. 1 Cause of School Suspensions.” Twin Falls Times-News, 20 Oct. 2018, magicvalley.com/news/local/education/teenage-vaping-e-cigarettes-are-no-cause-of-school-suspensions/article_12a5a201-af07-5262-bd64-e0d29b37715d.html. |
AuthorMy name is Quinn Peterson! I will be reflecting about my art work in this blog! Archives
May 2022
Categories
All
|


 RSS Feed
