|
Finally, exams are finished! I completed my final two, which were make-ups from when I missed school (the covid chronicles). Although they took up a portion of my week, I still got some classroom days to work. Mostly I spent time gathering various textures for where needed, however I also made this Row 3 logo to be used in the game. 
We’re pretty much in the final stretches and this will be the last check-in of the year. Aside from this weekend, time to work has come to a close. Ultimately I think we accomplished the necessities and bare minimum, but came to realize how grand of a scope Mountainheart was in the first place. We’re certainly turning in an abridged version of the original concept and gameplay, and it is not as polished as we may have hoped. Between covid and exam interruptions, we haven’t had much face to face time these last few weeks which has made this more difficult; there also hasn’t been much communication outside of class. Regardless, I think we accomplished enough to call it a working game, and even more important is that we have learned a lot throughout development. Summary:
0 Comments
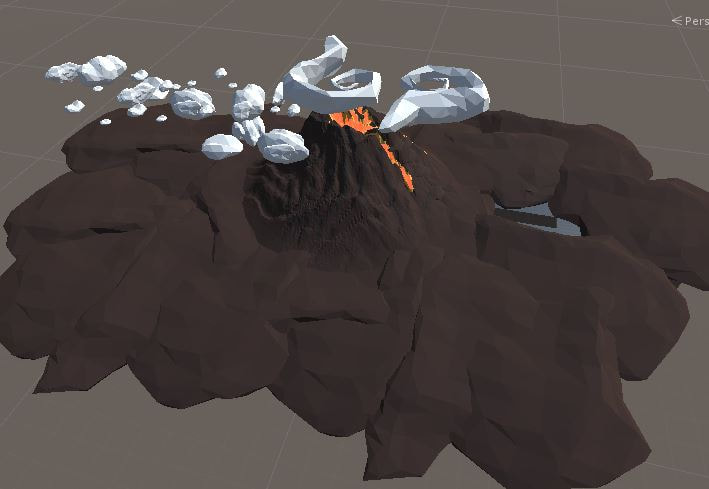 Above is the final rendition of my parkour obby scene. It is broken into three parts, though I tried to make it so they connected into one realistic environment. Overall, I tried to make it simplistic and with a stylized theme using low poly models. The most difficult part of the process of making this game was spacing each individual asset to create the perfect difficulty, which ended up being a tedious task. It was also difficult to program the invisible barrier to prevent the player from digressing at certain points. Another coding feat was making a mechanism for the player dying when they fall off certain objects.
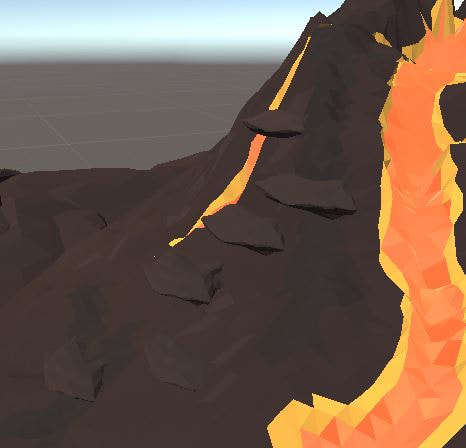
The player's next objective is the floating staircase in the mountain/volcano lair, underground. The steps are moving and shifting in opposite directions. They are also spaced further and further as the player goes down, and the jumps become steeper. Alas, after passing through all the obstacles, they will be greeted by a flag to signify their accomplishment and completion of the parkour obstacle course.
Conclusion:
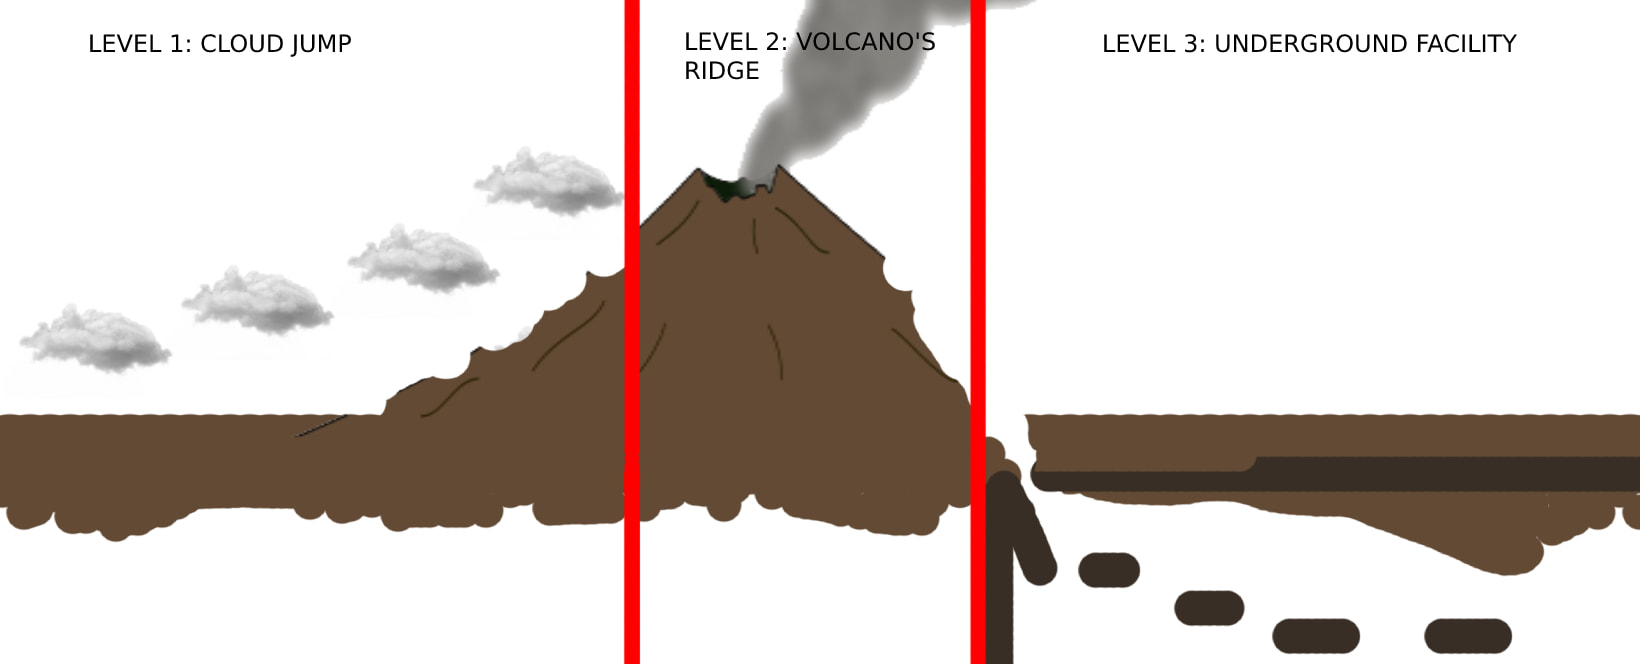 My game idea is for the player to navigate through three different levels which are essentially in an "Obby" format and involve jumping or moving between obstacles. The player will begin by jumping clouds which will be spaced apart to where the player will have to time their launch/release perfectly. The jumps will get harder and harder as the player progresses through this stage. They will then be at the top of a mountain/volcano. Their next steps will be to jump across the ledges inside of it in order to make it across without falling into lava. They will then make their way down the other side to reach an underground facility or "evil layer" which will involve various obstacles in the dark. Their final goal is to reach a "Lift" at the end of the facility and then surface back onto land, having gotten across the volcano. The players controls will be limited to basic movements (left, right, forward, etc) and jumping.
My design is meant to traverse multiple environments rather seamlessly, with some whimsical and fun aspects. I felt like a volcano would be a good parkour environment and a neat centric obstacle. Overall, I'm pretty happy with my level concepts and ready to bring it to fruition! In working through the Mystery Island project, I definitely found many of the processes to be draining, repetitive, and tedious. However, I can also appreciate the efficiency of modular design. I know it would take far longer to design a multitude of complex, individualized, assets rather than a few simple pieces that can be easily recycled. The process largely involved importing assets and organizing them together, and then using the vertex snap to piece together the parts. I also got experience with the easy-to-use terrain tool in Unity which I thought was simple and well-designed. One of my greatest take-aways from this assignment was project organization. As seen in the images below, I had to make sure to group and label everything precisely, otherwise it would be extremely easy to become overwhelmed or get lost. Each asset had many components; material, texture, and model. I created groups for each asset, and then compiled all those asset groups under a broader modular component group.
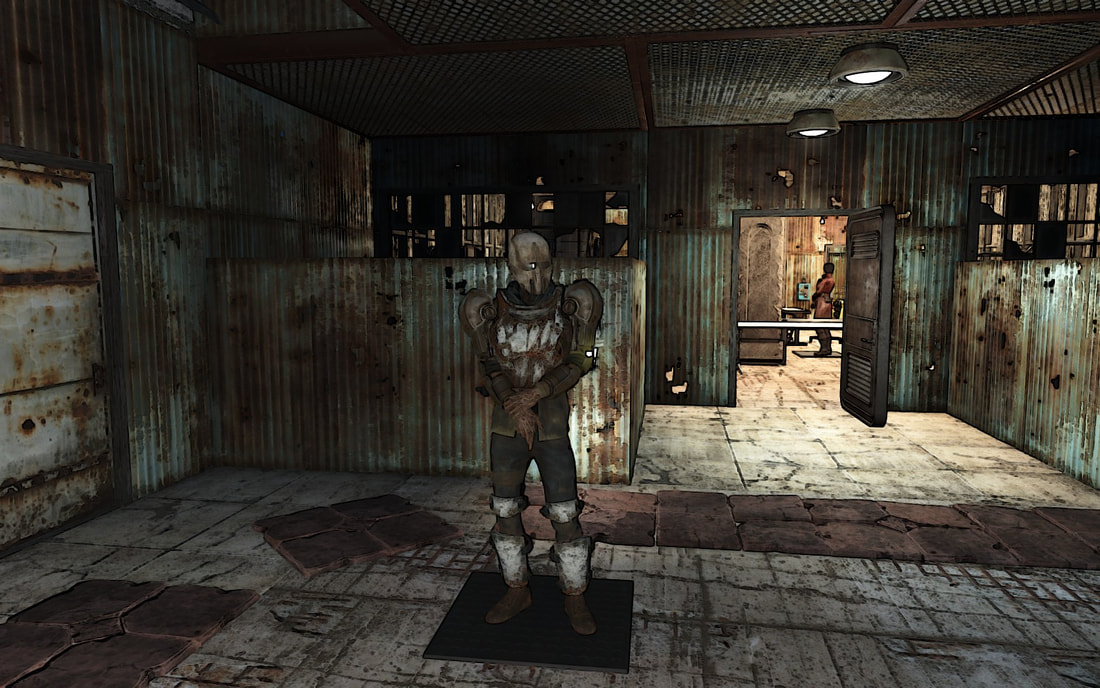
In creating the outpost to be used in this scene, I also learned a lot and refreshed some rusty areas. Getting experience modeling from scratch, UVW unwrapping, and texturing was the highlight of this activity for me. I definitely enjoyed the creative freedom, and being able to create the really cool textures that I used, even though I didn't have much to work with. Unwrapping the UVW templates was slightly aggravating, but I think I understand it to a far greater extent than I ever did in previous years when we went over it briefly. However, I think texturing in Photoshop was definitely my strong point. It was also important to learn how to model efficiently and set myself up for success when UVW unwrapping. In fact, several times I completely reworked a model so that the UVW part would be easier. 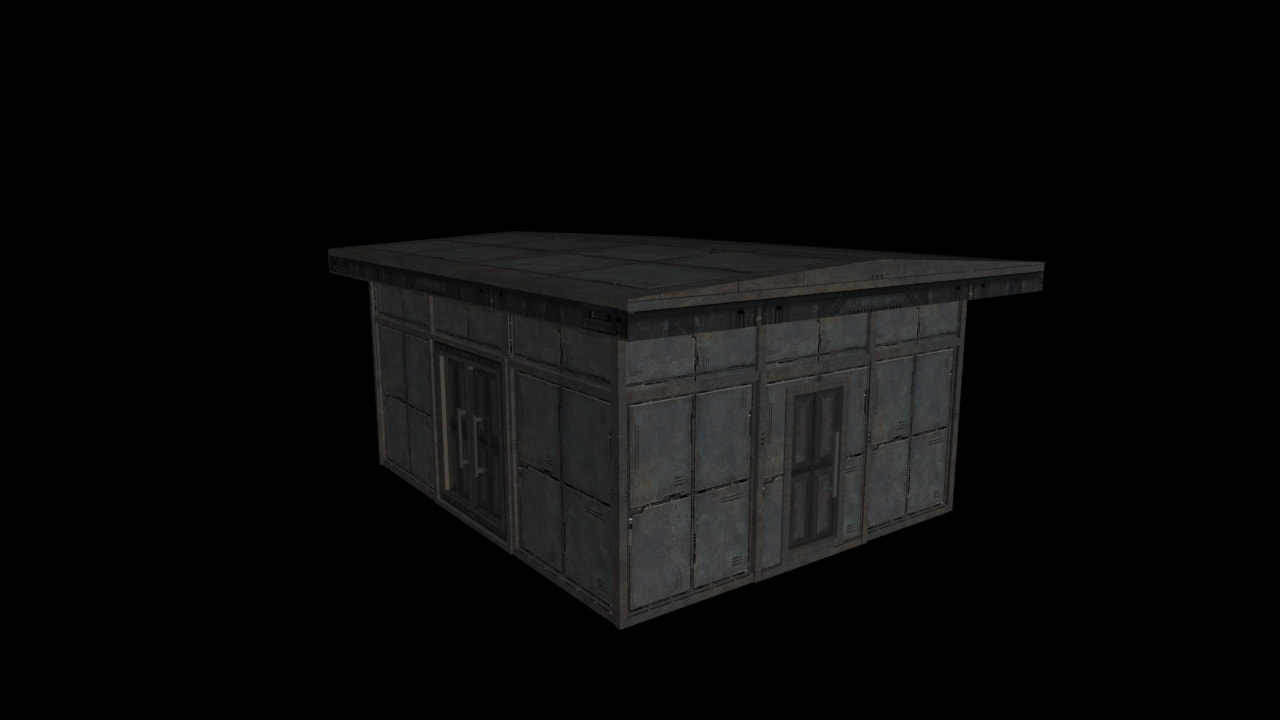 Overall, I learned a lot through this activity. I also was able to connect my scene to an interesting concept for a mystery-horror game on an Island, called Vacant Isle, where players are stranded and have to survive, explore, and collect clues in order to solve the mystery of the island which is now connected to their life/survival. My game concept is largely based upon exploring the outposts, as well as the clues left behind in them from their previous occupiers/inhabitants. They give the player something interesting to interact with on the island, besides the boring environment. 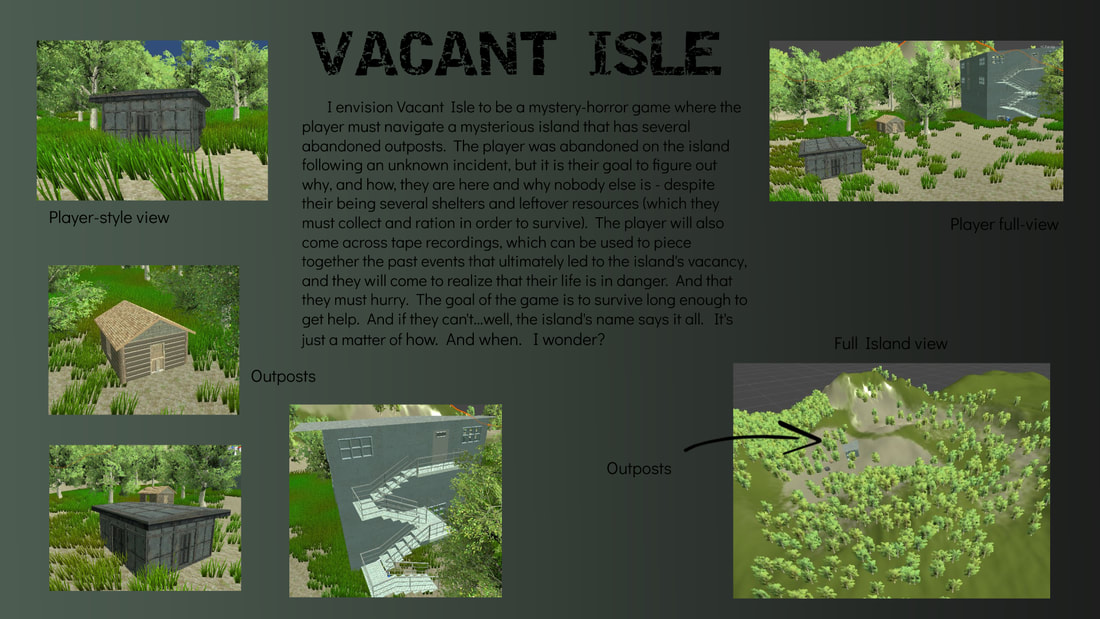 Review and main-points:
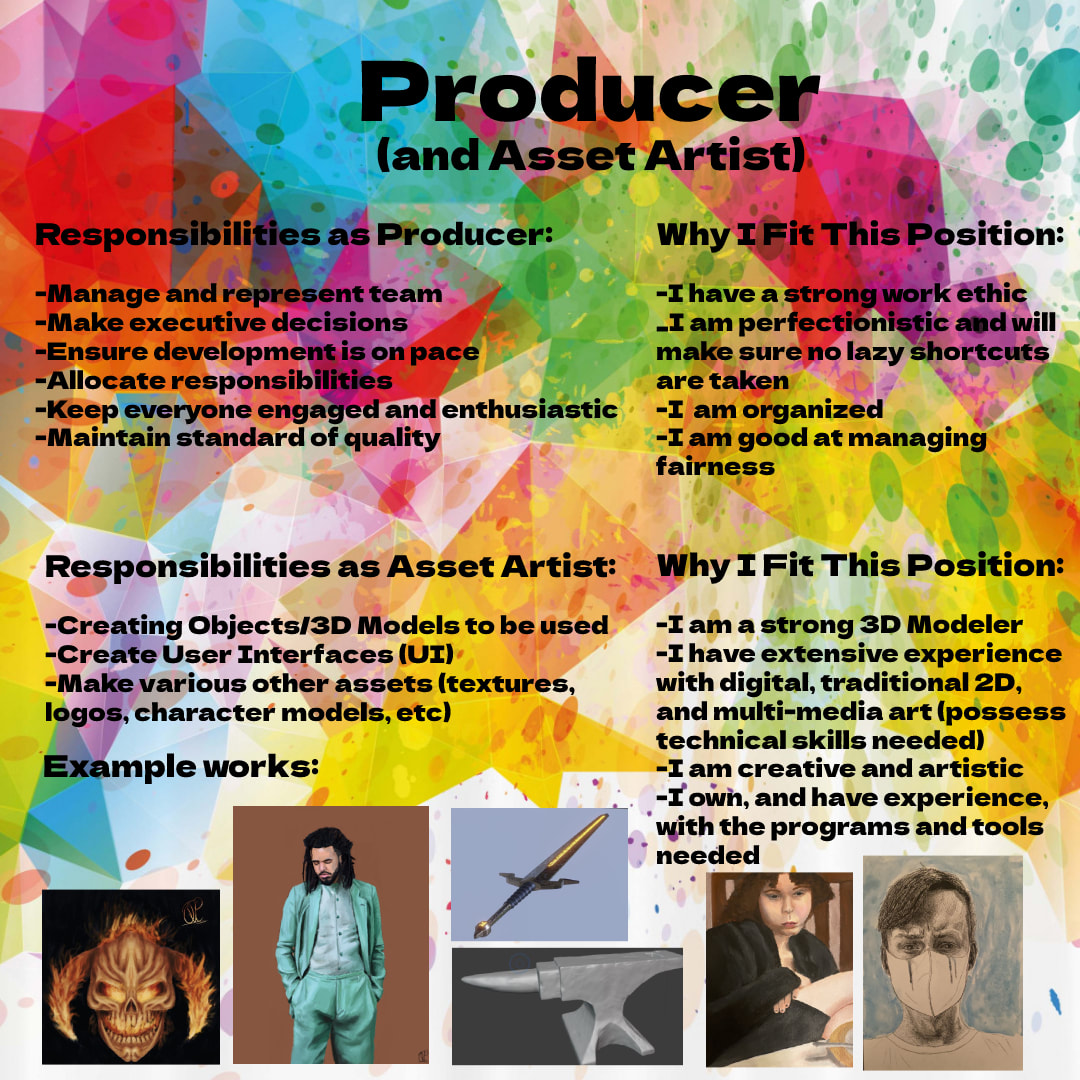 As the team lead, and producer, I undoubtedly have the most responsibilities on the team. Not only will I have to oversee all aspects of production and manage everyone else, but I will also have to actively contribute in the game's creation just as much as the other members. For me, this will be specializing in the art assets that go into the game in order to utilize my strengths and experience. This includes my four year pathway in 2D (now taking AP 2D: Drawing), and my interest in digital art outside of school. I am versed in the techniques and in using the main programs that go into creating digital art assets; such as Photoshop, Procreate, Illustrator, 3ds Max, and Blender among various others. My ability as an artist makes me adaptable and capable in almost any field regarding art, even in things I have no experience with. When assigning roles it is important to make sure everybody is happy, but also that the team is cohesive and that all responsibilities are covered. This can be very confounding, and not everyone will be doing strictly what they want; especially with such a small team. Because I am versatile as an artist, I put myself in a position where I could fill in around everybody else, and picked my position based on where we needed more hands on deck. Overall, I expect to be creating the majority of the 3D assets including the characters, objects, and modular components of the environment. I also will be contributing to the textures, logos, UI, and graphics that go into the game. Because we are spread thin, I will also have to chip in with compositing all the assets and putting thing's together in unity. As team lead I will also have to allocate responsibilities, decide on deadlines, and create the schedule we base our development off of. Overall, I will likely be in charge of how everything comes together and in filling in the areas where general well-rounded abilities are needed. Luckily I have an awesome team to work with :) Conclusion:
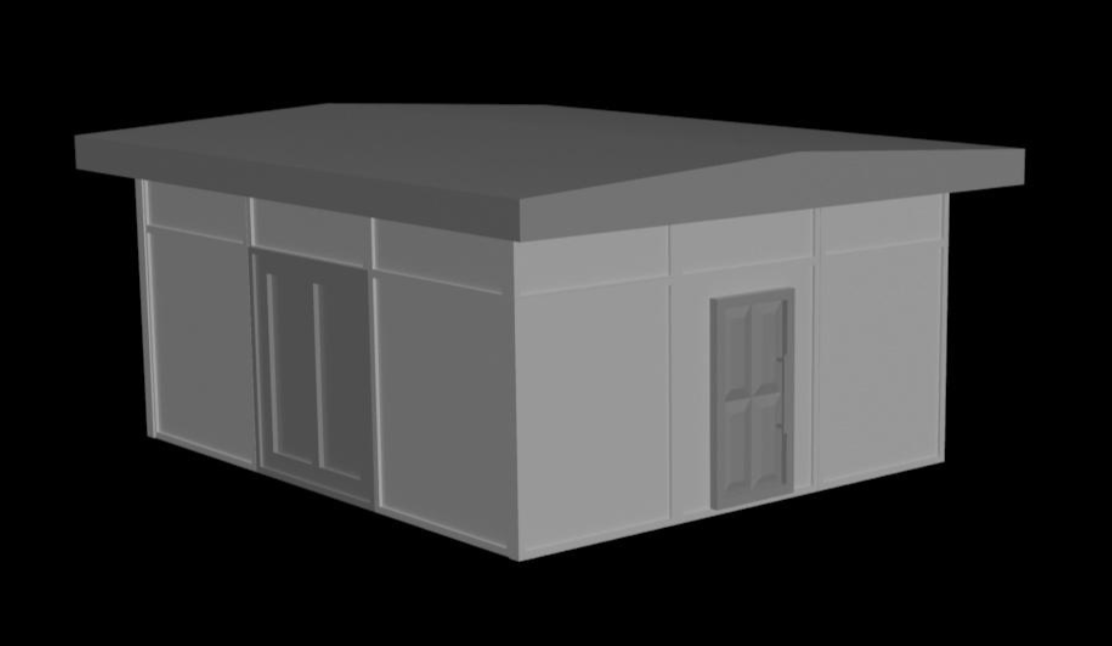
While designing my outpost I have encountered a few issues. One of which is in creating a viable design that is unique and original. I wanted to do something along a post- apocalyptic/dystopian theme, similar to a fallout shelter or bunker. My other goal was to keep it efficient and modular, however, because of this, the result is a bit boring to look at.
Creating the outpost is very similar to making the modular house. I have used modular components and segments, primarily from rectangles, although I have added extra details on particular pieces such as the doors and windows. The connect, chamfer, inset, bevel, extrude, and editable poly tools have been imperative in the design. This time around I have felt much better about organizing and naming each of the pieces as well as aligning them correctly. I learned from my mistakes in creating the modular house, but have otherwise used most of the same techniques from the tutorials. In the future I would like to texture my outpost so that it stands out more. Currently it looks very drab and plain, especially because the modular parts aren't super in-depth/detailed, with efficiency in mind. However, textures could make up for these deficits and add further layers to the design, distinguishing it more.
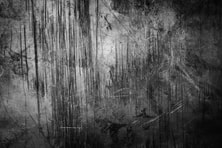
These images are two inspirations for future work with textures. I like the metal plates and the grunginess in the designs. Conclusion:
One of the most essential mainstream practices in creating 3D assets, especially in game design, is making them efficient and minimalist. Rather than developing every asset individually, modular design involves making only the most essential parts and creating pieces that can be reused/reapplied. This contributes to faster rendering, less storage space being taken up, smoother gameplay, and more overall efficiency. This also assists the level design team in adding on new levels or modifying the environment in the game, making the game more adaptable. 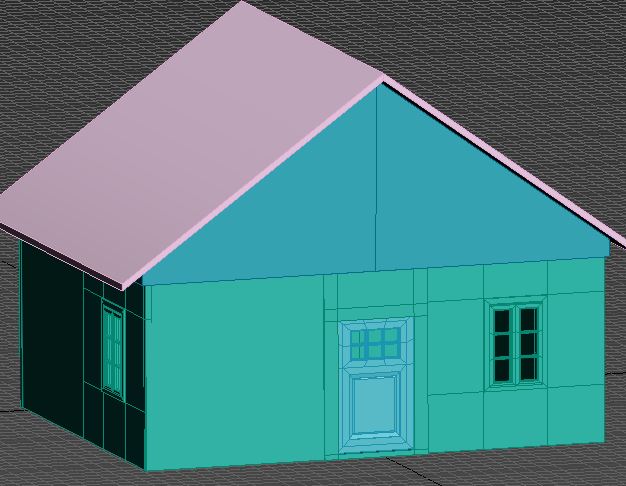 While working with modular design in creating this house, I found that it was a much quicker process overall. One of the most important things was to organize and name the pieces so that they didn't get mixed up, which could be tragic to forget and would make it extremely hard to discern all the different asset parts. I also was refreshed on good modeling techniques and tools, such as using connect, inset, and bevel. These tools were essential in creating the details on the window and door. The connect tool was especially useful in making new edges and vertices that helped when using the vertex snap tool and piecing all the parts together. Some difficulties I had included navigating the viewports and piecing the assets together. I also found that some of the rotations and orientations on my walls were not perfectly aligned which made it harder to line up with other asset pieces. 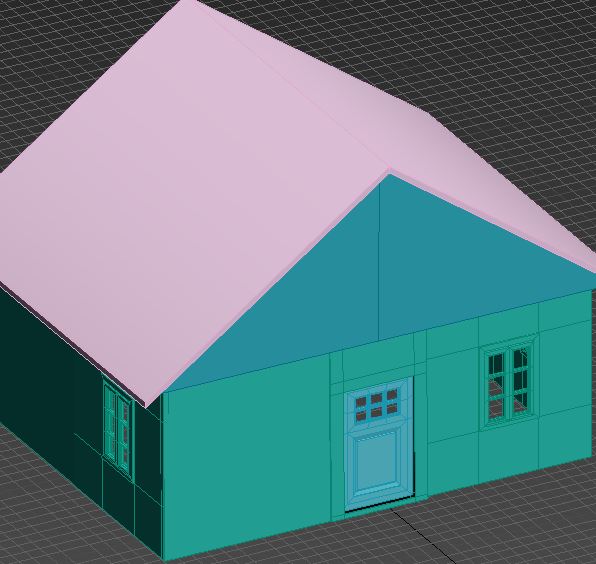 Overall, modular design made the process of creating the house far less tedious or overcomplicated. It is also a far better asset for using in a game since only the necessary parts of the façade were worked on, ignoring the unimportant details, edges, and faces. The most important lesson I learned is that it is important to be well organized by explicitly naming the pieces, and working with angle and vertex snap on - so that everything aligns cleanly. Conclusion:
Recently my class has been learning about the game design process, specifically the careers that are involved. Looking at these specific jobs, there are definitely some that peak my interest, that could be potential career paths I want to follow. I find myself to be a pretty naturally inclined artist and I have always picked up on drawing. This would lead me into the pathway option of 2D Artist. I really enjoy drawing and find that it comes with a lot more freedom than most other positions, which are usually working off of the concept by the 2D Artists. Since I am very creative and especially great at drawing creatures/humans, I think a character concept artist would be a really great position to suit me. Not only would it give me a lot of creative freedom, but I would also be able to do what I love.  Another option I am interested in is to be a 3D Modeler. I have really enjoyed my experience with Blender in particular and love the workflow of 3D Modeling. It is a very invigorating challenge to try to figure out what technique and specific path to take in order to create a particular asset or character. There are so many different ways to accomplish any given task, and modeling always has something new to offer. Being able to contribute directly to the end project of what players will actually see and interact with in the video game, would be really awesome to be a part of.  Although I was mildly surprised to learn that there was an official Writer position, it made a lot of sense. The writing, script, and plot to a game are arguably the most crucial aspect. Great scenery means nothing without an intriguing storyline to follow. I feel like this would be a great fit for me because I am a good writer and this position would also give me a lot of freedom to help develop a suspenseful plot, add in witty humor, and give life to the characters; all things I think I would strive at. Though I find interest in each of these individual jobs and components of the development team, I think I could also potentially make a great Art Director. This position would combine a lot of the skills I have been developing in this class such as 2D Art, 3D Modeling, Animating, and Texturing all into one job. The Art Director oversees a lot of the creativity and visual components of the project. As someone who has experience in all these fields, as well as many of the soft skills that come with this job such as interpersonal communication. creativity, and leadership, this would be a good goal to work up to. This proves to me it is important to keep up with all these hard skills, but also join extracurricular and take opportunities to develop a more impressive portfolio for soft skills too. Overall I think it is important to have some idea of what to look forward to in the future, and begin preparing now. 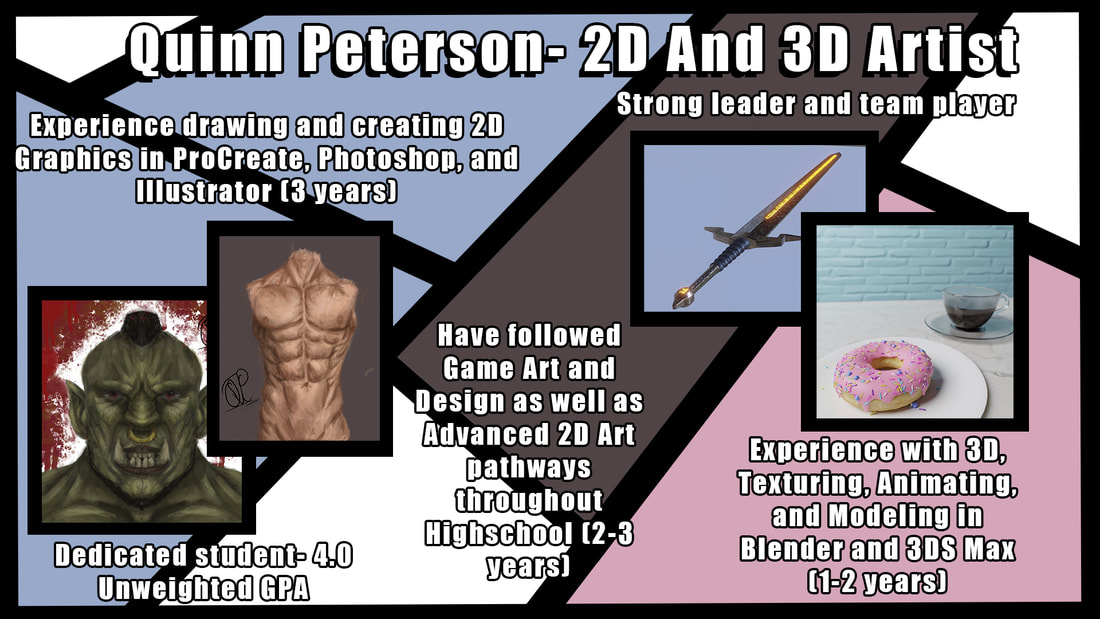 Summary:
Over this summer I decided to get more into 3D Modeling. Since 3ds Max hasn't been the greatest experience for me, I figured I'd try learning Blender since it is free and looked intriguing. At first glance, the UI was absolutely beautiful. The dark color scheme and gray tones complimented by a poppy orange helped me feel a lot more comfortable and less overwhelmed, unlike 3ds Max which immediately welcomes you with bright whites and turquoise blue. To add on to that, Blender opened within a few seconds, significantly differing from 3ds Max which makes your computer growl and takes several minutes. Overall from first impression, Blender felt a lot smoother and more comforting than 3ds Max. Another great thing about Blender, that comes with it being free, is tons of great tutorials that are easily accessible on YouTube. Blender Guru and CG Fast Track are both extremely detailed and go at great paces. They give a great tour through the program for newbies such as myself, contrasting from my experience with 3ds Max tutorials which felt overwhelming and never properly touched on all the basic functions of the program. Blender Guru has a great personality and is someone I would watch just for entertainment, making 3D Modeling more of a fun activity rather than a task. I began with his Doughnut Tutorial and it touched on all the significant features in Blender, helping me explore my interests and get a hang of all the basics. 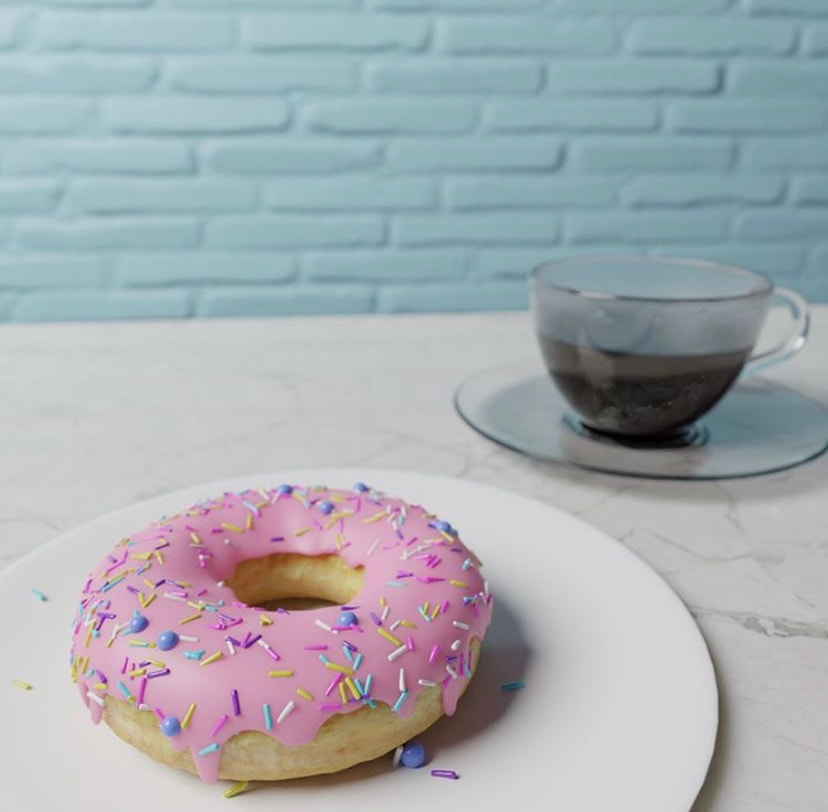 This is the final render from the doughnut scene that the tutorial walked me through. It introduced me to several different modeling techniques and helped give a lot of variation through making both the cup/plates and doughnut. I fell in love with a lot of features on Blender that were new to me, such as sculpting and compositing. Blender also has a completely different workflow from 3ds Max, with features such as Loop Cuts and the Knife Tool which made it much more intuitive. It was really fun to try so many new things such as the particle system, sculpting, hand painting, advanced material compositing, modeling off of reference, adding in custom materials, and much more! After the doughnut tutorial, I moved on to another introductory level tutorial that came from an industry professional and showed some different modeling techniques. 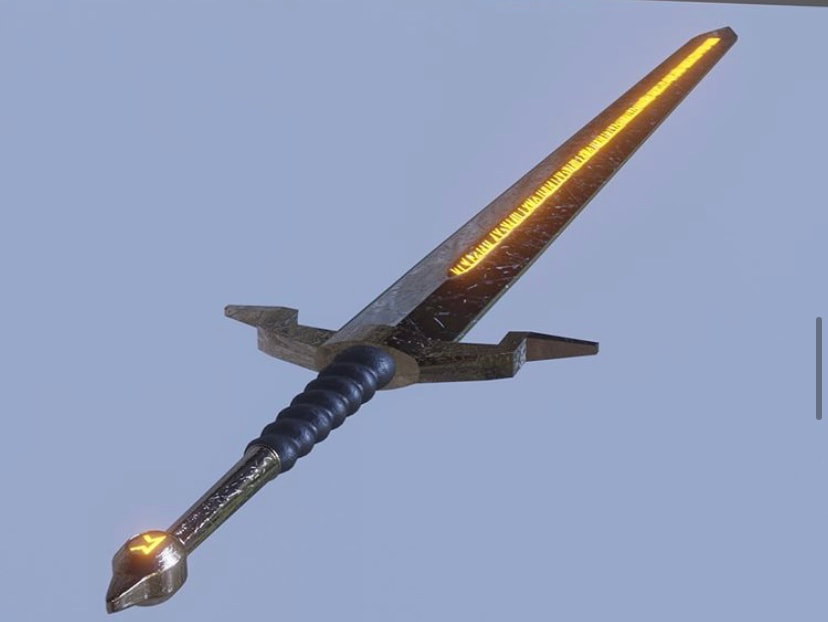 From this tutorial I got more experience with the Eevee Renderer rather than Cycles Renderer and also tried more advanced modeling techniques such as in creating the handle. One of the coolest parts was using the Stamp Tool in order to handpaint the symbols on the sword. I then moved on to the next tutorial in the series which involved composing a scene using the sword I made, which was much more complicated. Through this I got a much stronger grasp on rendering and compositing, as well as using/finding outside resources such as the rocks and character shown. 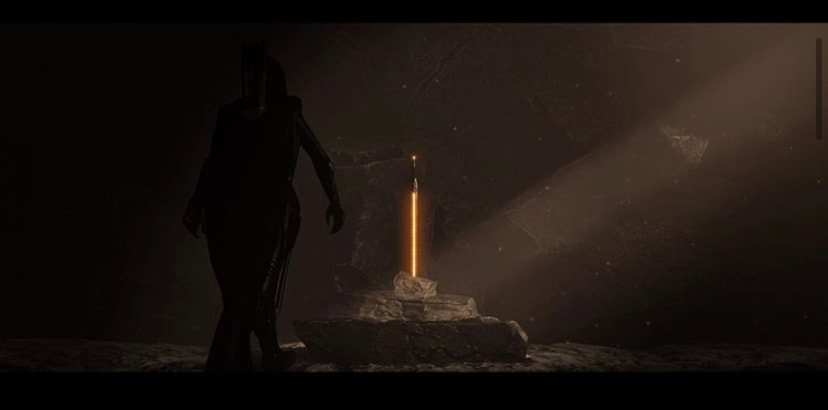 Overall I think Blender is an extremely well optimized program that runs surprisingly smooth despite how many features it has. It was a much greater beginning experience than 3ds Max and I feel like I got a firm grasp of the program through better tutorials and a more navigable UI as well as modeling workflow. However, it was nice to be able to carry over some of my experience from 3ds Max so that it was less overwhelming. I would love to see Blender be more widely taught and integrated into the industry as time goes by, because I think it is a top tier program that made much more sense to me. Summary:
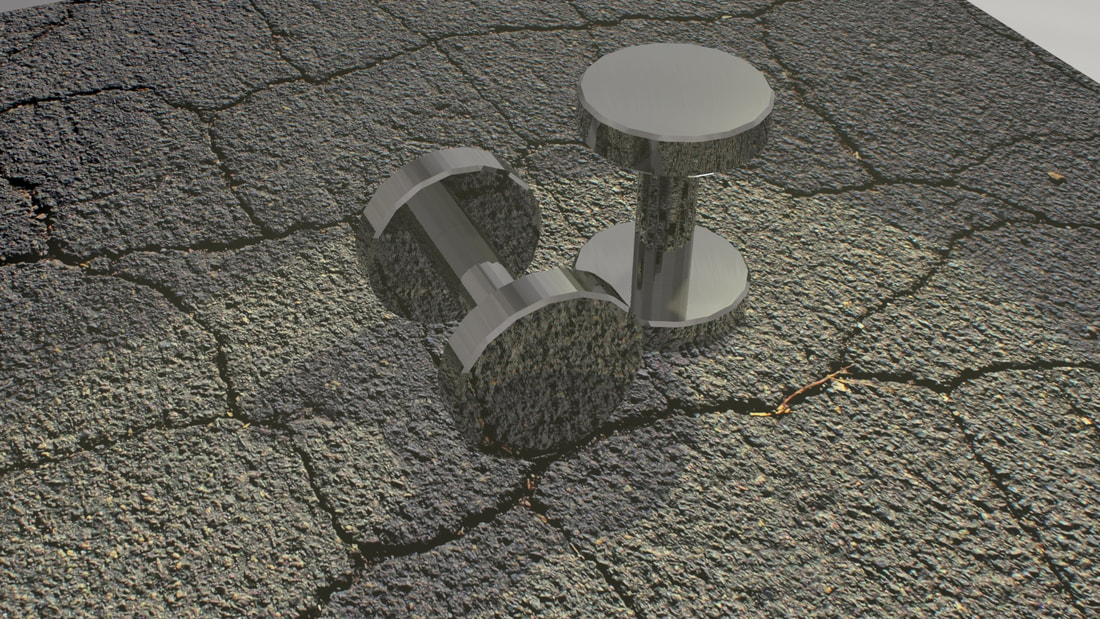
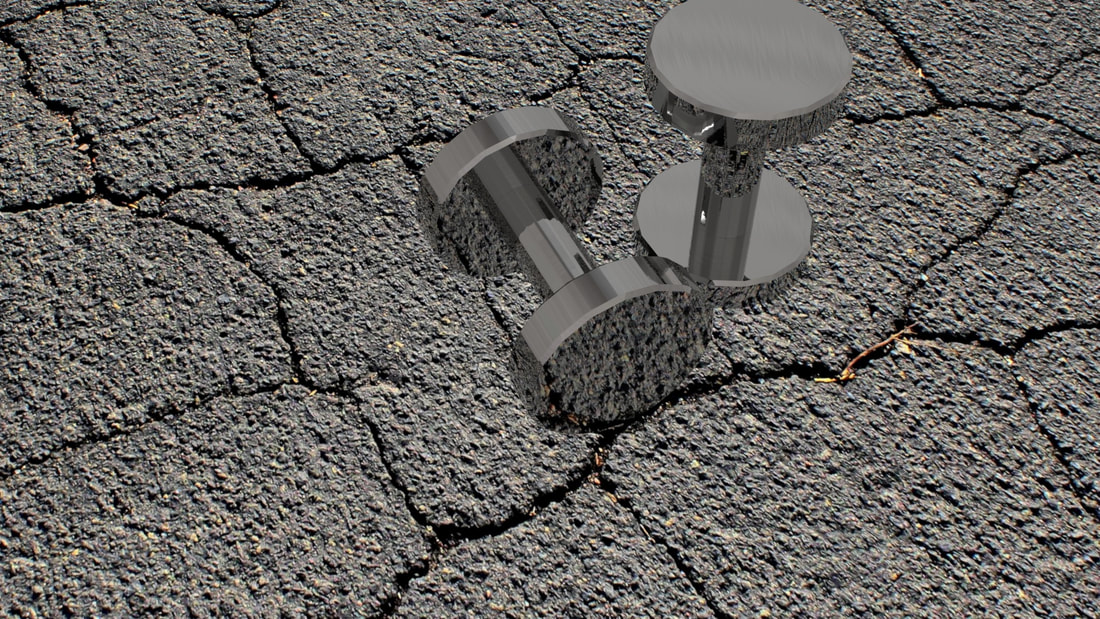
References: Sword Tutorial: https://www.youtube.com/watch?v=zHv4VDoCwYc Doughnut Tutorial: https://www.youtube.com/watch?v=TPrnSACiTJ4 Blender Citation: Community, B. O. (2018). Blender - a 3D modelling and rendering package. Stichting Blender Foundation, Amsterdam. Retrieved from http://www.blender.org Lighting is an extremely valuable tool when it comes to creating a render or scene in any 3D modeling program. For one of my assignments I had to place two easily modeled dumbbells and on a simple planar. I was able to make an extremely realistic and advanced looking scene with simple models that took a few minutes to make, using just lighting and materials. First, I applied a texture to the plane and used a UV Map to alter it to fit the scene better. To compliment that, I added in a bump map which gave it more texture. After that I added the brushed metal preset physical material to my dumbbells and messed around with the parameters a bit to create a more realistic looking texture on them. Then I added a skylight and spot light to create the effect of a street lamp shining down on the dumbbells, and altered the color a bit so it looked more like augmented light. I turned on shadows so it appeared more realistic and more interactive with the ground/plane. Finally I added fog to create a more ominous effect and to top off the scene.
As you can see, the image without lighting is tremendously worse and appears bland. Not only do the dumbbells feel distant from the ground, but the scene is basic and doesn't appear to be realistic at all. However, with the lights and environmental effects, the scene is surreal and the environment sets a tone/mood. Overall this goes to show that lighting and materials can go a long way and can turn simple models into a very advanced and realistic scene. Summary:
|
AuthorMy name is Quinn Peterson! I will be reflecting about my art work in this blog! Archives
May 2022
Categories
All
|


 RSS Feed
